Travel photography tips are only worth reading if they change what you actually do with your camera once you land somewhere new, not just what sounds good in a blog post the night before your flight. This guide walks through the gear, light, composition, and etiquette decisions that separate forgettable vacation snapshots from photos you’ll want printed and framed. You’ll also get real settings, real products, and real prices, so nothing here is left vague.
Whether you’re heading to Rome with a Fujifilm X100VI or shooting an entire two-week backpacking trip on an iPhone 15 Pro, the same principles apply. Good travel photography tips aren’t about owning more gear, they’re about knowing how to use what’s already in your bag. That’s the difference between a photo that looks like everyone else’s and one that actually captures the trip.
By the end of this article, you’ll have a packing list, a light-timing strategy, composition tricks for unfamiliar places, a respectful approach to photographing strangers, and a backup plan that protects your photos if something goes wrong. Let’s get into it.
Why These Travel Photography Tips Matter More Than Your Camera
Most beginners assume better photos come from better equipment. In reality, a $1,600 Sony A7IV in the wrong hands produces the same flat, poorly timed shots as a phone camera. What actually moves the needle is preparation: knowing where the sun will be, understanding your subject, and slowing down enough to notice details most tourists walk right past.
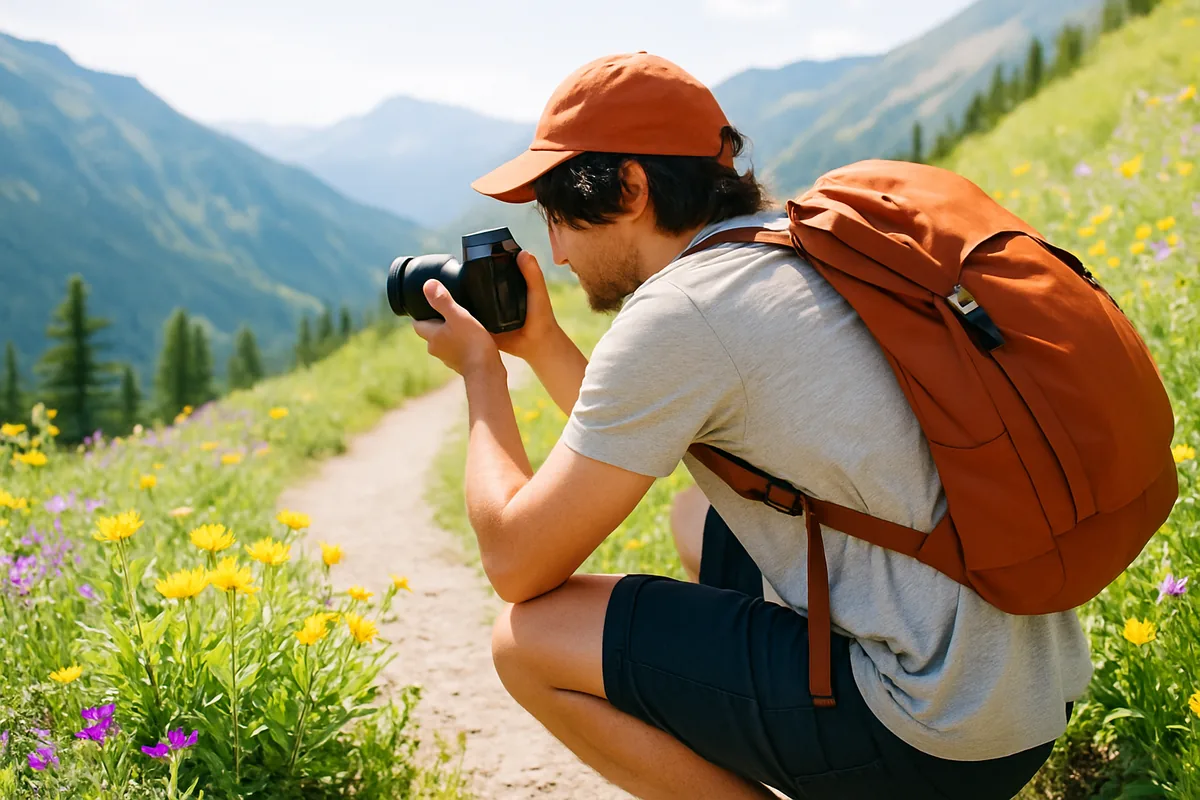
This is why the most useful travel photography tips have almost nothing to do with megapixels. Professional travel photographers who shoot for National Geographic or stock agencies carry gear that fits in a single backpack. What sets their images apart is timing, patience, and an eye trained to spot a moment before it happens.
The mindset shift that improves every shot
The shift is simple: stop photographing “the trip” and start photographing specific moments within it. Instead of shooting the entire Colosseum from the same angle as ten thousand other tourists, look for a single gladiator-costumed performer resting in the shade, or the way afternoon light falls through an archway.
This mindset applies whether you’re shooting with a Fujifilm X100VI or an iPhone 15 Pro. Both cameras can produce excellent images because the limiting factor isn’t sensor size, it’s whether you slowed down long enough to see the shot.
Common mistakes beginners make on their first trip
A few patterns show up constantly with new travelers:
- Shooting everything at eye level from a standing position instead of crouching or finding elevation
- Photographing landmarks at midday when the light is flat and harsh
- Bringing three camera bodies and never using two of them
- Skipping people and street scenes entirely out of nervousness
- Forgetting to photograph small details like street signs, food, or hands at work
Fixing even two or three of these habits will noticeably improve your results, and it costs nothing. If you’re shooting primarily with a phone, our guide on travel photography with a phone covers vacation-specific settings that pair well with everything in this article.
Packing the Right Gear Without Overloading Your Bag
Travel photography gear decisions come down to one question: what will you actually carry on day 10 of a trip when your feet hurt? A lot of gear that seemed essential in the packing list stays in the hotel room by the second week. Build around versatility, not volume.
A well-organized bag also matters more than people expect. The Peak Design Travel Backpack ($259.95) is popular among working travel photographers because it compresses down for flights but expands for gear-heavy days, and it fits most airline carry-on size limits.
Camera bodies and lenses worth bringing
For most trips, one versatile zoom beats three prime lenses you’ll rotate through anxiety, not necessity. A 24-70mm f/2.8 covers landscapes, street scenes, and loose portraits without a lens change. If weight is the priority, a single mirrorless body like the Fujifilm X100VI, which has a fixed 35mm-equivalent lens, keeps your kit under three pounds total.
| Setup | Approx. Weight | Best For |
|---|---|---|
| Sony A7IV + 24-70mm f/2.8 | ~3.3 lbs | Versatility, low light, portraits |
| Fujifilm X100VI (fixed lens) | ~1.1 lbs | Street photography, minimal packing |
| iPhone 15 Pro | ~0.5 lbs | Fast trips, discretion, everyday shots |
Accessories that actually get used
Skip anything you haven’t used in the last three trips. A short list of accessories consistently earns its weight:
- A GorillaPod ($30) for stabilizing shots on uneven surfaces without carrying a full tripod
- Two extra camera batteries, since cold weather and screen use drain them faster than expected
- A polarizing filter for cutting glare off water and glass in bright cities
- A microfiber cloth and rain cover, especially for coastal or mountain trips
If your kit leans mostly on your phone, the settings breakdown in our smartphone camera settings guide pairs well with these lightweight camera gear for travel choices.
Travel Photography Tips for Mastering Light and Timing
Of all the travel photography tips in this article, this is the one that changes results the fastest. Light dictates mood, color, and shadow detail more than any lens or camera body ever will. Planning your shooting times around the sun is free, and it’s the single biggest upgrade most beginners skip.
Shooting during golden hour and blue hour
Golden hour happens roughly one hour after sunrise and one hour before sunset, when light turns warm and low, softening shadows on faces and buildings. Blue hour follows sunset, giving city skylines a deep blue tone that’s nearly impossible to recreate with editing alone.
Apps like PhotoPills ($10.99) calculate exact golden hour and blue hour times for your specific location, along with sun and moon direction, which is genuinely useful when you’re scouting a shot the night before. Checking this five minutes in advance is one of the simplest travel photography tips that consistently pays off.
Handling harsh midday sun in cities
Midday sun creates hard shadows and blown-out highlights, especially on stone plazas and white buildings common in Mediterranean cities. A few fixes work reliably:
- Move your subject into open shade, like under an awning or archway
- Use a polarizing filter to deepen the sky and cut reflections off water or windows
- Shoot details and textures instead of wide scenes, since close-ups hide harsh light better
- Save landmark shots for early morning or evening, and use midday for markets, food, and interiors
For phone shooters dealing with the same problem, our article on natural light photography with your phone breaks down similar fixes specific to smartphone sensors.
Composition Techniques That Instantly Elevate Travel Photos
Good travel photo composition turns a generic landmark shot into something with depth and story. The rule of thirds is a starting point, not a rulebook: placing your subject off-center, roughly a third of the way into the frame, usually creates more tension and interest than dead-center placement.
Using leading lines and framing in unfamiliar places
Unfamiliar cities are full of natural leading lines: cobblestone streets, canal edges, staircases, and rows of columns. At Rome’s Trevi Fountain, shooting from a low angle along the water’s edge uses the fountain’s curves as a lead-in line toward the sculpture, instead of a flat frontal shot everyone else takes.
At Kyoto’s Fushimi Inari shrine, the thousands of stacked torii gates create a natural tunnel effect. Standing centered in the gate path and shooting straight through uses the architecture itself as a frame, which reads far better than a wide shot from outside the gates.
Including a sense of scale and local detail
Wide shots of famous sites often flatten scale and feel empty of story. Including a person in the frame, even a stranger walking through, gives viewers a sense of how large a space actually is. Beyond landmarks, look for:
- Food close-ups showing texture, steam, or hands preparing a dish
- Weathered doors, hand-painted signs, or peeling paint that show a place’s age
- Hands at work, whether that’s a vendor, artisan, or street musician
- Reflections in puddles, windows, or wet pavement after rain
These detail shots often end up being the photos people remember most from a trip, more than the landmark itself. If you’re shooting these details on a phone, the framing tips in our guide to sharper smartphone photos apply directly here.
Photographing People and Culture Respectfully
Photographing people while traveling is where a lot of beginners freeze up, either avoiding it entirely or shooting from a distance without asking. Both extremes miss out on the most compelling images a trip can offer. The fix isn’t a trick, it’s basic respect and a little patience.
Asking permission and building trust
Documentary photographer Steve McCurry, known for his portrait of the Afghan Girl, has talked about spending time with subjects before raising the camera, sometimes sharing tea or a conversation first. That approach translates to everyday travel: a smile, a nod, or a few words in the local language go a long way before you point a lens at someone.
Learning basic phrases like “may I take your photo?” in the local language shows respect and usually gets a warmer response than gesturing with a camera. Offering to send or show the photo afterward, even just on your phone screen, builds trust and often leads to a better, more relaxed shot the second time.
Candid street photography etiquette
Candid shots capture authentic moments, but they carry responsibility. A few guidelines keep things respectful:
- Avoid photographing people in vulnerable situations, like begging or distress, without consent
- Skip images that reduce someone to a stereotype rather than showing them as an individual
- Be willing to delete a photo on request, no argument
- Research local customs beforehand, since photography restrictions vary widely by country and religious site
These travel photography tips around people and culture matter as much as any technical setting, because the photo isn’t worth the discomfort of the person in it. If portraits are your focus, our phone portrait photography guide has additional posing and consent tips that apply to any camera.
Camera Settings and Editing Workflow on the Road
Getting your camera settings dialed in before the trip saves time when you’re standing in front of a scene that won’t wait. A reliable baseline: aperture priority mode at f/8 for landscapes, f/2.8 for portraits and low light, and auto ISO capped around 3200 to avoid excessive noise on most modern sensors.
Shooting in RAW vs JPEG while traveling
RAW files hold significantly more detail in shadows and highlights, which matters for landscapes shot in tricky midday light or dramatic skies. The tradeoff is file size, RAW files run three to four times larger than JPEG, which adds up fast on a multi-week trip.
A practical middle ground: shoot RAW for landscapes and important portraits, and switch to JPEG for casual daily shots you’re mainly using for social media. This keeps storage manageable without sacrificing quality where it counts.
Quick mobile editing apps for daily uploads
For editing on the go, Lightroom Mobile (free, with optional paid Creative Cloud plans) offers RAW editing and cloud sync directly from your phone. Snapseed (free) is lighter and faster for quick JPEG touch-ups when you just need a five-minute edit before posting.
Backing up as you shoot matters just as much as editing. A SanDisk 1TB portable SSD (around $90) lets you offload memory cards nightly without relying solely on cloud storage, which can be slow or unreliable on hotel Wi-Fi. For phone-based workflows, our smartphone photography beginner’s guide covers app settings that speed up this whole process.
Protecting Your Gear and Photos While You Travel
Losing a camera is inconvenient. Losing two weeks of unedited photos is worse. Protecting both should be planned before you leave, not improvised after something goes wrong.
Backup strategies for photos on long trips
The safest setup uses three copies of every photo, in three different places. A common approach:
- Shoot with dual SD card slots set to record identical backups, if your camera supports it
- Copy cards each night to a portable SSD like the SanDisk 1TB drive
- Upload a compressed backup to cloud storage whenever Wi-Fi allows
This way, losing one card, drive, or cloud connection never means losing the trip entirely.
Insurance and gear security tips
Camera gear often exceeds standard homeowner’s or renter’s insurance coverage limits. Companies like State Farm and Allstate offer scheduled personal property riders that cover cameras and lenses individually, which is worth checking before an international trip with expensive equipment.
For physical security, an anti-theft bag like a Pacsafe backpack uses slash-resistant fabric and lockable zippers, which deters opportunistic theft in crowded markets or transit hubs. Never leave a camera bag unattended on a café chair or train seat, even for a minute, since that’s when most gear theft actually happens. For general safety guidance when traveling abroad, the U.S. Department of State’s travel advisories page is worth checking before any international trip.
Putting These Travel Photography Tips Into Practice
None of this requires new gear or a total overhaul of how you shoot. Start with one change on your next trip: check golden hour times before you leave the hotel, pack one versatile lens instead of three, or simply ask before photographing a stranger instead of shooting from a distance.
The travel photography tips that matter most are the ones you actually use in the field, not the ones you read and forget. Pick two or three from this article, build them into your next trip’s routine, and you’ll notice the difference in your photos before you even get home to edit them.
Frequently Asked Questions
What are the most important travel photography tips for beginners?
Focus on light, composition, and storytelling before worrying about gear. Shoot during golden hour, get closer to your subject than feels comfortable, and photograph small details like street signs or local food, not just landmarks.
What camera is best for travel photography?
A mirrorless camera like the Sony A7C II (around $2,199 with a kit lens) or Fujifilm X100VI ($1,599) is popular for its compact size and image quality. Many travelers also get excellent results with recent iPhones or Google Pixel phones.
How do I take good travel photos with just my phone?
Use the native camera app's grid lines to apply the rule of thirds, tap to set exposure and focus manually, and shoot in the golden hour whenever possible. Apps like Lightroom Mobile also let you shoot RAW-like files (DNG) for more editing flexibility.
How much camera gear should I bring on a trip?
Less than you think. One versatile zoom lens like a 24-70mm, a lightweight tripod such as a Peak Design Travel Tripod ($599), and one spare battery cover most situations without overloading your bag.
Is it rude to photograph strangers while traveling?
It can be, depending on the culture and context. Always make eye contact and ask permission with a smile or simple gesture when photographing someone up close, and be especially respectful at religious sites or in rural communities.
How do I back up my travel photos safely?
Use the 3-2-1 rule: keep photos on your memory card, copy them to a portable SSD like the SanDisk Extreme Portable SSD, and back up a third copy to cloud storage such as Google Photos or Backblaze whenever you have Wi-Fi.

Mark Finley is a professional photographer, educator, and the founder of FormLovers. With years of experience behind the lens, Mark has transitioned from a passionate hobbyist to an industry professional, capturing stunning visuals and mastering the business of photography.