Creative photography techniques built around light and color are the fastest way to turn a flat, forgettable snapshot into something people actually stop scrolling to look at. Anyone can point a camera at a sunset, but understanding how light behaves and how color influences mood is what separates a tourist snapshot from a photograph that feels intentional. This guide breaks down the practical, hands-on side of using light and color creatively, not just the theory.
You’ll learn how to work with golden hour, harsh midday sun, and window light, how to shape a portrait with color gels on a flash, and how color theory can strengthen a composition you already have in front of you. We’ll also cover long exposure light trails, glass prism flares, and the editing habits that enhance a photo without making it look fake.
Every technique here comes with real settings, real gear, and real prices so you can start applying it on your next shoot instead of just reading about it.
What Makes Light and Color the Core of Creative Photography Techniques
Light and color are the only two elements in photography you can control almost completely, regardless of your gear budget. Composition matters, gear matters, but a photographer with a $400 camera who understands light will consistently outshoot someone with a $4,000 body who doesn’t. That’s why most creative photography techniques start with a simple question: where is the light coming from, and what color is it?
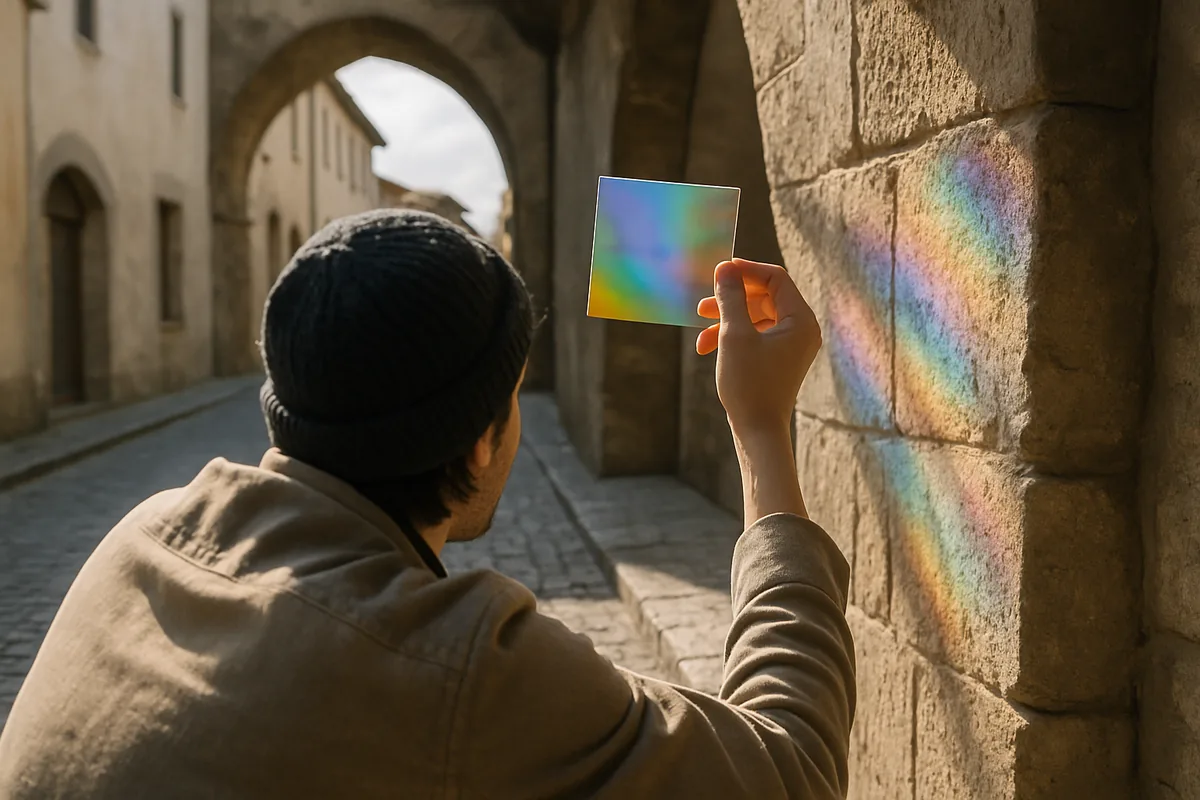
That’s the foundation of light and color photography: everything else — composition, gear, editing — is built on top of these two variables.
Why light shapes emotion in a photo
Hard, direct light creates tension and drama through deep shadows and high contrast. Soft, diffused light — the kind you get on an overcast day or through a north-facing window — feels calm, gentle, and flattering on skin. Photographer Gregory Crewdson is known for staging elaborate cinematic scenes where the direction and quality of light does as much storytelling as the subject itself.
Why color creates mood and meaning
Color carries psychological weight before a viewer even processes the subject. Steve McCurry’s famous “Afghan Girl” portrait works partly because the deep green background isolates and intensifies her eyes; that’s color theory doing narrative work. Once you start seeing color as a storytelling tool instead of decoration, your creative photography techniques improve almost overnight.
Using Natural Light Creatively
Natural light costs nothing, and it changes every few minutes, which makes it one of the richest sources of creative photography techniques available to any photographer, phone or DSLR. Learning to read it is a skill, not luck.
Shooting during golden hour and blue hour
Golden hour happens roughly one hour after sunrise and one hour before sunset, when sunlight travels through more atmosphere and turns warm, soft, and low-angled. Blue hour follows about 20 to 30 minutes after sunset, giving skies a deep cobalt tone that pairs beautifully with warm artificial lights in a cityscape. Try f/2.8, ISO 100, and 1/250s for golden hour portraits, then switch to a tripod and slower shutter speeds once blue hour sets in.
A camera with strong low-light performance, like a Canon EOS R6 or Sony a7 IV, makes blue hour shooting much easier because you can push ISO without heavy noise. For more on timing your shoots around natural light, check out our guide on the best time of day for travel photography.
Working with harsh midday sun instead of avoiding it
Most beginners are told to avoid midday sun entirely, but harsh light can be a creative tool if you use it deliberately. Position your subject so hard shadows fall in an interesting pattern, or use the sun as a strong backlight for silhouette work. Learning to embrace harsh light is one of the most underrated creative photography techniques for beginners, and deep, high-contrast shadows also make for compelling graphic compositions — our shadow photography ideas article has ten ways to turn that harsh light into the subject itself.
Using window light indoors for portraits
A single north or east-facing window can act like a giant natural softbox. Position your subject at a 45-degree angle to the window rather than facing it directly, and use a white foam board opposite the window to bounce light back into the shadows. This setup alone accounts for a huge share of natural-light creative photography techniques used by portrait photographers who never touch a flash.
Creative Photography Techniques With Artificial and Colored Light
Once you’re comfortable with natural light, colored artificial light opens up a completely different set of creative photography techniques. These creative lighting techniques rely on color as much as direction and intensity, which is where gels, mixed white balance, and backlighting turn an ordinary portrait into something that looks like a music video still.
Using gels on a flash or continuous light
Color gels are thin sheets of colored plastic you place over a flash or continuous light to tint the light itself. Rosco and LEE Filters both sell gel packs in the $10 to $30 range, and they attach easily to a speedlight like the Godox V1 ($259) using a magnetic mount or gaffer tape. A common setup uses one gelled light (say, magenta) as the key light and a complementary gelled light (teal or blue) as a background or rim light, creating strong color contrast without any editing.
A few quick color gel photography tips worth remembering: stick to one dominant hue and one accent hue, never stack more than two colors on a single subject, and lock your white balance to daylight so the gel colors stay pure instead of shifting with auto white balance.
Mixing tungsten and daylight white balance for color contrast
Set your camera’s white balance to daylight (around 5500K) while lighting your subject with tungsten bulbs, and the tungsten light will render warm orange while any daylight or blue gel in the background stays cool. This mismatch is one of the simplest gel lighting photography tricks because it doesn’t require gels at all — just contrasting light sources and a locked white balance.
Silhouette and backlighting setups
Place your main light source behind your subject and expose for the background instead of the face, and you’ll get a clean silhouette with a colored glow around the edges. Backlighting photography works especially well at golden hour or with a single gelled flash positioned directly behind the subject, aimed at the camera. Meter off the sky or background light, not the subject, or the silhouette will wash out.
Playing With Color Theory to Strengthen Composition
Color theory in photography isn’t an art-school abstraction — it’s a practical shortcut for building images that feel balanced even in chaotic scenes. Once you understand the color wheel, you’ll start noticing color relationships everywhere, and that awareness becomes one of the most transferable creative photography techniques you can develop.
Complementary color pairings
Complementary colors sit opposite each other on the color wheel — blue and orange, red and green, purple and yellow — and they create natural visual tension when placed together in a frame. A classic real-world example is a yellow taxi against a blue sky in New York City, or an orange sunset behind a teal-painted building. Recognizing these pairings quickly is one of the simplest creative photography techniques to practice on a daily walk, since the eye reads opposing colors as more vivid when they sit side by side.
Monochromatic and analogous color schemes
Monochromatic images use different shades and tones of a single color, which feels calm and cohesive — think of a foggy blue morning scene or an all-orange desert sunset. Analogous schemes use colors that sit next to each other on the wheel, like yellow, orange, and red, which is why so many golden hour photos feel harmonious without any editing at all.
Finding color in everyday urban scenes
You don’t need a studio to practice using color in composition. Walk a few blocks in any downtown area and you’ll find red fire hydrants, yellow street signs, and blue awnings that create instant complementary contrast. Try this exercise for a week: pick one dominant color each day and only photograph scenes where that color appears strongly — it forces you to slow down and actually see color instead of just noticing it. Our city photography guide has more ideas for spotting compositions like this on the street.
Long Exposure and Light Painting as Creative Photography Techniques
Long exposure work is one of the most rewarding experimental photography ideas because the results genuinely surprise you, even after years of shooting. Slowing your shutter down turns moving light into flowing color, which is a completely different application of creative photography techniques than anything you can do with a single frozen frame.
| Scenario | Shutter Speed | Aperture | ISO |
|---|---|---|---|
| Car light trails at night | 10–20 sec | f/8 | 100 |
| Light painting indoors | 15–30 sec | f/8–f/11 | 100 |
| Daytime long exposure (water/clouds) with ND filter | 1–4 sec | f/11 | 100 |
| Star trails | 15–25 min (or stacked frames) | f/4 | 800–1600 |
Basic long exposure settings for light trails
To capture car light trails at night, start with f/8, ISO 100, and a 10 to 20 second exposure, adjusting based on how much traffic is passing through your frame. A busy street corner or highway overpass works well because the volume of cars gives you continuous streaks rather than gaps. Nailing exposure for trails is one of the more technical creative photography techniques, but the settings above give you a reliable starting point.
Light painting with a flashlight or LED wand
Light painting means moving a handheld light source through the frame during a long exposure so it “draws” in the final image. A basic $15 LED flashlight works fine for simple streaks, while a store-bought light wand with adjustable colors gives you more control over the final look. Keep the shutter open for 15 to 30 seconds in a dark room or outdoor space, and move the light steadily and predictably for the smoothest trails.
Gear checklist: tripod, remote shutter, ND filter
A sturdy tripod is non-negotiable for long exposure work — the Manfrotto Befree (around $150) is compact enough for travel but stable enough for 20-second exposures. Add a 6-stop ND filter, like the Tiffen ND ($60 to $100), if you want to shoot long exposures in daylight, such as smoothing out moving water or clouds. Our waterfall photography guide covers ND filter settings in more depth for that specific use case.
Reflections, Prisms, and Glass for Unexpected Color Effects
Some of the most memorable creative photography techniques don’t require any lighting gear at all — just a piece of glass and some patience. Prisms, puddles, and household glass objects bend and scatter light in ways your eye doesn’t expect, which makes them a favorite trick among photographers looking for something different.
Shooting through a glass prism for rainbow flares
A glass photography prism, like the ones sold by Dproptical for around $15 to $25 on Amazon, splits light into rainbow flares when held close to your lens and angled toward a strong light source. Hold the prism at the edge of your frame, rotate it slowly while looking through your viewfinder, and shoot at a wider aperture like f/2.8 to keep the flare soft and dreamy. Prism work is one of those creative photography techniques that costs almost nothing but photographs like an expensive lens flare filter.
Using puddles and windows for reflected color
After rain, city streets fill with puddles that mirror neon signs, traffic lights, and streetlamps, creating natural double-exposure-style color without any editing. Get low to the ground, almost at puddle level, to maximize the reflection filling your frame. Storefront windows work the same way during the day, layering reflected color and shapes over whatever’s happening inside. Our reflection photography guide has more setups worth trying.
Household glass objects as creative props
A wine glass, a crystal paperweight, or even a CD case can bend light in ways a prism can’t. Fill a glass with water and shoot a subject through it for a warped, painterly effect, or use a CD’s reflective surface to bounce colored light onto a portrait subject’s face. These are the kind of low-cost, high-creativity experiments covered in our creative photography with everyday objects article.
Editing to Enhance, Not Fake, Light and Color
Good editing should make a photo look like a better version of what your eye actually saw, not a different scene entirely. The strongest creative photography techniques in post-production are subtle — small adjustments that support the light and color you already captured in-camera.
Adjusting white balance and color grading in Lightroom
Start every edit in Adobe Lightroom Classic or Capture One by fine-tuning white balance with the temperature and tint sliders until skin tones and neutral grays look accurate. Getting white balance right before you touch any other slider is one of the most overlooked creative photography techniques in post-production. From there, use the color grading panel to push shadows slightly cool and highlights slightly warm — a subtle version of the classic teal-and-orange cinematic look, made in small moves of five or ten points at a time.
Split toning for cinematic color contrast
Split toning lets you assign one color to your shadows and a different color to your highlights, which is how a lot of moody portrait and travel work gets its signature look. A common combination is teal or blue in the shadows with warm amber or gold in the highlights, echoing the same color theory in photography discussed earlier in this guide. Keep saturation on split toning low, usually under 20, so it reads as mood rather than a filter.
Common editing mistakes that ruin natural light
Oversaturating a sunset until the orange turns neon, or stacking heavy HDR until shadows look flat and gray, are two of the fastest ways to make a naturally beautiful photo look artificial. If a color you didn’t actually see in person shows up in your edit, dial it back. The goal of every one of these creative photography techniques is believability, not exaggeration.
Building a Personal Style With Creative Photography Techniques
Technique only becomes style once you’ve practiced it enough times to make instinctive decisions instead of following a checklist. This is the long game of creative photography techniques — the point where you stop thinking about settings and start trusting your eye.
Keeping a color and light journal
Keep a simple note on your phone logging what time of day, what light source, and what color combination produced your favorite shots each week. Over a few months, patterns emerge — maybe you gravitate toward cool blue shadows and warm skin tones, or high-contrast backlit silhouettes. Logging results this way turns scattered creative photography techniques into a consistent, recognizable style.
Studying photographers known for color work
Alex Webb’s street photography layers multiple colors and light sources into single, complex frames, while Saul Leiter pioneered shooting through glass and reflections in 1950s New York to build soft, painterly color images. Study how they place color within a frame, not just what colors they use. Watching how established photographers apply color theory in photography will sharpen your own eye faster than any tutorial.
Practicing one technique per week
Pick one technique from this guide — gel lighting, backlighting, prism flares, long exposure trails — and shoot only that for seven days. This kind of focused repetition is how experimental photography ideas turn into reliable skills, and it’s a far more effective way to build a portfolio than shooting a little of everything at once. If you’re short on subject ideas while practicing, our list of photography ideas for when you have nothing to shoot can keep you moving.
Your Next Move: Pick One Technique and Shoot This Week
Light and color are the two variables you can control on every single shoot, regardless of budget or experience level, and mastering the creative photography techniques in this guide comes down to repetition, not talent. Start with something achievable: shoot golden hour twice this week, or pick up a $15 prism and photograph three subjects through it.
Whichever technique you choose, shoot it deliberately, review what worked and what didn’t, and then move on to the next one. That’s genuinely how a personal style gets built — one focused week of practice at a time.
Frequently Asked Questions
What are the best creative photography techniques for beginners to start with?
Start with natural light techniques like shooting during golden hour and blue hour since they require no extra gear. Once comfortable, move on to color theory basics like pairing complementary colors, then experiment with gels or a glass prism as your budget allows.
Do I need expensive gear to use these creative photography techniques?
No, many techniques like using window light, finding reflections in puddles, or shooting complementary colors cost nothing but your time. A basic glass prism ($15-$25) or a set of gels ($10-$30) are the only small investments worth making early on.
How do I use color gels without making my photos look fake?
Use one gel color at a time and keep the intensity subtle by placing the gel on a secondary light rather than your main light source. Balancing gelled light against a neutral white balance background usually looks more natural than saturating the entire frame.
What camera settings work best for light painting photography?
A typical starting point is f/8, ISO 100, and a shutter speed between 10 and 20 seconds, adjusted based on how bright your light source is. You'll also need a sturdy tripod and a remote shutter or self-timer to avoid camera shake during the long exposure.
How can I find good color combinations in everyday scenes?
Look for complementary pairs that occur naturally, like a yellow taxi against a blue sky or orange autumn leaves against a teal door. Training your eye by shooting one dominant color story per week makes it easier to spot these combinations quickly.
Why do my photos look flat even when the light is good?
Flat-looking photos often come from shooting in even, front-facing light with no shadow contrast or color separation between subject and background. Try repositioning so the light source is at a 45-degree angle or behind your subject to add depth and dimension.

Mark Finley is a professional photographer, educator, and the founder of FormLovers. With years of experience behind the lens, Mark has transitioned from a passionate hobbyist to an industry professional, capturing stunning visuals and mastering the business of photography.