Creative photography doesn’t require a plane ticket, a new lens, or a weekend workshop — it starts with whatever is sitting on your kitchen counter right now. A coffee mug, a handful of rubber bands, a glass of water by the sink: these are the raw materials that professional photographers use to sharpen their eye when they’re not on a paid shoot. The skills you build photographing a spoon are the same skills that make a $5,000 destination shoot look intentional.
In this guide, you’ll get practical setups for lighting, composition, and editing that work with objects you already own. You’ll also get a structured challenge you can start today, no shopping trip required. Every idea here is meant to be shot this afternoon, not someday when you upgrade your gear.
If you’ve ever felt stuck creatively because you don’t have “enough” equipment, this is the corrective. Constraint is a teacher, and everyday objects are some of the most patient teachers around.
Why Everyday Objects Are a Goldmine for Creative Photography
Limiting yourself to what’s already in the house forces decisions that gear shopping lets you avoid. When you can’t buy your way to a better shot, you’re forced to move the light, change your angle, or rethink the composition instead. That’s exactly the kind of problem-solving that creative photography rewards over time.
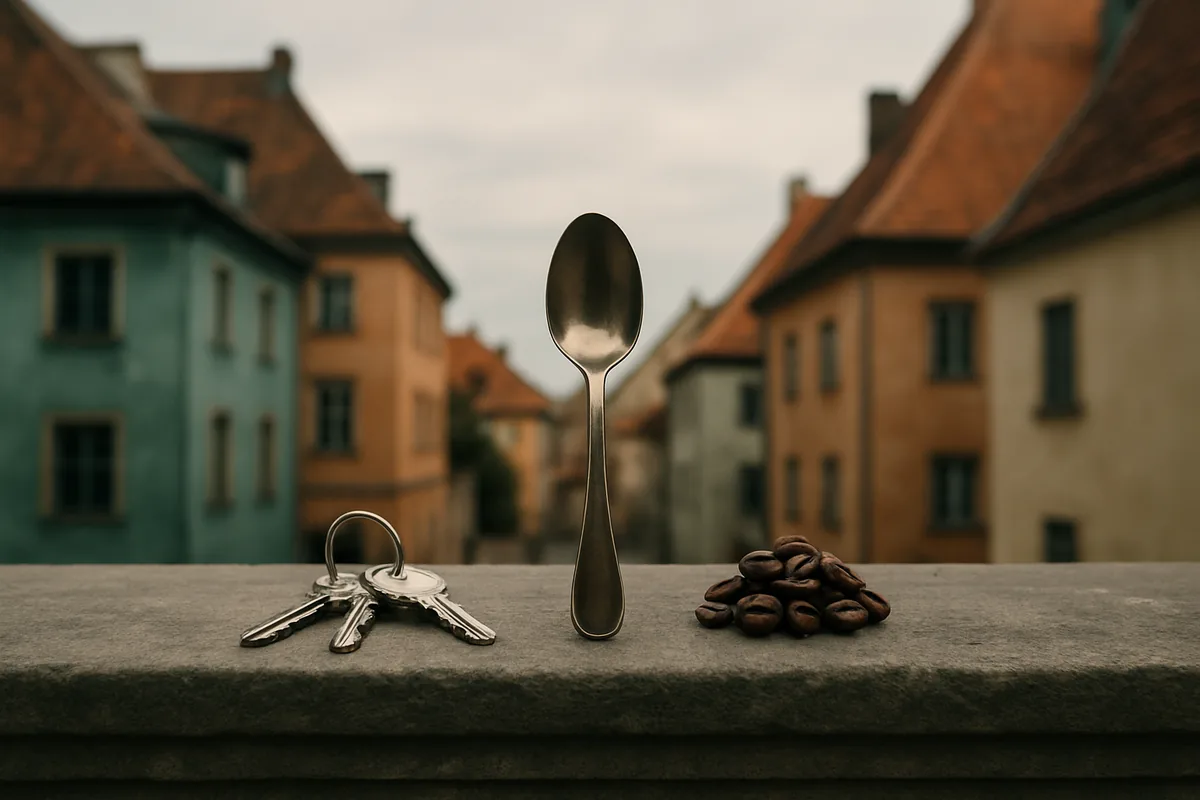
Working with household objects photography also removes the pressure of a “big” subject. A sunset or a mountain range already looks good on its own merit. A rubber band on a white plate has to earn its interest through light, framing, and idea — which is a much better training ground for developing a personal style.
What This Approach Teaches You That Gear Can’t
A new camera body won’t teach you how to read shadows falling across a countertop at 4 p.m. Only practice does that. Photographing ordinary objects daily trains your eye to notice things a casual glance would miss: the way a fork’s tines cast four parallel shadows, or how steam curling off a mug catches window light differently minute to minute.
This kind of repetition builds instinct. After a few weeks of still life photography ideas practiced at your kitchen table, you’ll start seeing compositions everywhere — in a parking lot, in a grocery aisle, in the way your dog’s leash coils on the floor.
Real Photographers Who Built Careers on Simple Subjects
Photography educators like Chase Jarvis and Chris Orwig have long used constraint-based exercises with students precisely because they work faster than any lecture on gear. A classic art-school assignment — photograph 100 objects from your desk, each one differently — still shows up in university photography programs because it forces students past their first ten “obvious” ideas into genuinely original ones.
The lesson isn’t that gear doesn’t matter. It’s that creative photography skills transfer upward. A photographer who can make a stapler look interesting on a Tuesday afternoon will have no trouble making a client’s product or a landscape look compelling when the stakes are higher.
Household Items That Make Surprisingly Great Subjects
Not every object photographs equally well, but almost everything photographs better than you’d expect once you control the light and angle. Here are categories worth raiding right now.
Kitchen and Food Items
Coffee beans scattered on a dark plate create natural texture and repetition. Ice cubes melting under a desk lamp turn into abstract macro studies within minutes, and they change every thirty seconds, which makes them great for practicing quick decision-making. Citrus slices held up to a window show translucent detail that a flat, front-lit shot never captures.
- A cracked egg on dark slate for high-contrast texture
- Sliced bread showing crumb structure under side light
- Spilled spices (cinnamon, paprika, turmeric) arranged in gradients
- A single grape with a water droplet for macro practice
Office Supplies and Tools
Rubber bands stretched over a pencil, paper clips linked into a chain, or a ring of keys fanned out on a table all offer strong lines and repeating shapes — the bread and butter of still life photography ideas. A stapler or a pair of scissors shot from a low angle against a plain background can look almost architectural.
Spoons deserve special mention. Their curved, reflective bowls act like tiny fisheye mirrors, distorting whatever is around them. Angle one toward a window and you’ll capture a warped, miniature version of the room — a favorite trick for macro photography objects because it’s dramatic and completely free.
Glassware, Water, and Reflections
A plain drinking glass filled with water becomes an improvised lens. Hold it a few inches in front of your camera or phone lens, and whatever is behind it will bend and flip upside down inside the glass. A $5 glass prism from Amazon does something similar, splitting window light into small rainbows you can position across a subject.
For gear comparison, a dedicated macro setup like a 60mm macro lens (roughly $400 new) will get you closer and sharper detail than a phone. But a $15 clip-on macro lens for your phone gets you 80 percent of the way there for a fraction of the cost, which matters if you’re just testing whether macro work is something you enjoy.
| Tool | Approx. Cost | Best For |
|---|---|---|
| Glass of tap water | Free | Distorted reflections, DIY lens effect |
| $5 glass prism | ~$5 | Rainbow light streaks, flare |
| Clip-on phone macro lens | ~$15 | Close-up detail on a budget |
| 60mm dedicated macro lens | ~$400 | Professional-grade sharp macro work |
Simple Lighting Setups for Creative Photography at Home
Light matters more than the object itself. The same coffee mug can look flat and forgettable or moody and expensive depending on where the light is coming from. You don’t need studio strobes to control it — you need a window, some cardboard, and patience.
Using a Single Window for Soft Light
Position your subject near a window that doesn’t get direct sun, or hang a sheer curtain over one that does. This softens harsh shadows and gives you the same quality of light photographers pay hundreds of dollars for in a softbox. Shoot in the late morning or mid-afternoon when the light is bright but not blinding.
Turn your subject slowly and watch how the shadows shift across it. This alone is one of the fastest ways to understand light for creative photography, because you’re seeing cause and effect in real time instead of guessing.
DIY Light Modifiers You Already Own
A sheet of white foam board (about $4 at a craft store) works as a bounce reflector, filling in shadows on the dark side of your subject. A piece of black cardboard does the opposite — it absorbs light and deepens shadows, which photographers call negative fill. Aluminum foil crumpled and smoothed over cardboard makes a punchy, slightly textured reflector for more dramatic contrast.
These three tools together mimic what a $200-plus studio strobe kit does: control, shape, and direct light. The physics is identical; only the price tag changes.
Working With a Flashlight or Desk Lamp
A $15 clip lamp with an adjustable head gives you directional light you can position exactly where you want it — low and to the side for long dramatic shadows, or almost overhead for a cleaner, more editorial look. A phone flashlight held at a steep angle across a textured object (bread crust, fabric, tree bark) exaggerates texture in a way flat light never will.
Try shooting the same object with the lamp in four different positions: front, side, above, and behind. Comparing the four side by side is one of the fastest lessons in creative photography you can give yourself in under ten minutes.
Composition Techniques to Turn Boring Objects Into Art
Once light is under control, composition decides whether the shot feels accidental or intentional. The good news is that composition costs nothing — it’s entirely about where you stand and how you frame.
Playing With Scale and Perspective
Shoot a paperclip from six inches away and it fills the frame like a sculpture. Shoot the same paperclip from three feet away on a cluttered desk and it disappears into the background. Extreme close-ups and top-down flat lays (shooting straight down at 90 degrees) are two of the most reliable perspective tricks for making a small object feel significant.
Using Negative Space
Isolate one object against a plain wall, a sheet of poster board, or an empty section of countertop. The empty space around the subject does real work — it gives the eye somewhere to rest and makes the object itself feel more deliberate, almost like a product photograph. This is one of the simplest still life composition tips because it requires zero extra equipment, just an emptier background.
Repetition and Patterns
Lining up ten pencils, twenty bottle caps, or a handful of paper clips in a tight grid creates a pattern that’s naturally satisfying to look at. Breaking that pattern with one item facing a different direction or a different color adds tension and draws the eye straight to it. Classic compositional rules still apply here — the rule of thirds works just as well on a coffee cup handle as it does on a mountain ridge, and a leading line as simple as a spoon’s handle can guide the viewer’s eye toward the main subject.
For more structured warm-up ideas along these lines, this list of creative photography ideas to try at home pairs well with the household-object approach covered here.
Turning Household Objects Into a Story
A single striking image is good. A short series that tells a story is what actually builds a portfolio. The objects don’t change — the narrative structure around them does.
Building a Mini Concept Series
Pick a simple theme like “morning routine” and shoot five images that support it: a coffee mug steaming on the counter, keys next to a wallet, sunglasses on a windowsill, a phone showing the time, and a jacket on a hook by the door. None of these objects are exciting alone, but together they read as a complete story with a beginning, middle, and end.
This kind of thematic thinking is exactly what separates photography practice ideas that go nowhere from ones that actually build a body of work. Five connected images say more than fifty disconnected ones.
Adding a Human Element Without Showing a Face
Hands are one of the most underused props in home photography. A hand wrapped around a mug, fingers tying a shoelace, or an arm reaching for a light switch all imply a person without needing a portrait. Brands like Nike and Apple lean on this technique constantly in minimalist product-style content for social media — you see a hand, a product, and enough context to fill in the rest yourself.
It’s a useful trick if you’re camera-shy or don’t have a model on hand. Your own hand, photographed carefully, does the job just fine.
Editing Tips to Make Simple Shots Look Professional
Editing is where a decent shot becomes a polished one. The tools matter less than the restraint you use with them — a few thoughtful adjustments beat a dozen heavy-handed ones.
Free and Affordable Editing Apps
Snapseed (free, iOS and Android) handles most basic corrections and has a genuinely good selective adjustment tool for brightening just one part of a frame. Adobe Lightroom Mobile offers a free tier with solid presets, and the paid Creative Cloud Photography plan (around $9.99 a month) adds full desktop syncing and cloud storage. VSCO, at roughly $29.99 a year, is popular for its film-inspired presets if you want a consistent look across a whole series.
Color Grading for Mood
Small, specific adjustments go further than global filters. Increasing clarity slightly brings out texture in things like bread crust, fabric, or wood grain. Correcting white balance so whites actually look white (rather than yellow or blue) instantly makes a shot look more intentional. Cropping tighter after the fact, even by 10 or 15 percent, often strengthens a composition you almost got right in camera.
If you’re shooting on a phone, pairing these editing habits with solid in-camera technique matters even more — this guide on getting sharper photos with your phone covers the fundamentals that make editing easier afterward.
Practicing Creative Photography as a Daily Habit
Consistency beats intensity. Ten minutes a day of deliberate practice will build your eye faster than one long, exhausting weekend shoot every few months.
The 30-Day Object Challenge
Pick one household object — a coffee mug works well — and photograph it differently every day for 30 days. Change the light, the angle, the background, or the story each time. By day 15 you’ll have run out of the obvious ideas and be forced into genuinely creative photography territory; by day 30 you’ll have a visible record of how much your eye has sharpened.
- Days 1–10: Focus on lighting variations (window, lamp, flashlight)
- Days 11–20: Focus on composition (scale, negative space, patterns)
- Days 21–30: Focus on storytelling and editing style
Building a Portfolio From Small Projects
Between paid gigs, these small projects fill your portfolio and your Instagram feed with fresh, consistent work. A themed series of still life photography ideas shot at home often gets more engagement than a single travel photo, simply because it shows range and a repeatable process. Clients notice that kind of consistency, too — it signals you can produce reliable work without needing a dream location or an expensive prop budget.
For additional reading on the technical side of light and exposure that applies just as well indoors as outdoors, the Smithsonian Institution has extensive photography archives and educational resources worth exploring, and Wikipedia’s overview of the history of still life art is a useful reference for understanding where these compositional habits come from.
Start Tonight With What’s Already on Your Table
You don’t need a trip, a new lens, or a bigger budget to practice creative photography — you need a window, an object, and thirty focused minutes. Pick one item from your kitchen or desk right now, set up near natural light, and shoot it from five different angles before you put it back.
Do that again tomorrow with a different object, and again the day after. In a month, you’ll have a sharper eye, a stronger portfolio, and proof that the best photography practice ideas were sitting on your counter the entire time.
Frequently Asked Questions
What is creative photography exactly?
Creative photography is an approach that prioritizes original ideas, composition, and storytelling over technical perfection or expensive equipment. It often involves reimagining ordinary subjects, like household objects, through unusual angles, lighting, or concepts rather than simply documenting what's in front of the camera.
Can I do creative photography with just my phone?
Yes, most smartphones from the last five years, including budget models like the iPhone SE ($429) or Google Pixel 7a ($499), have manual controls and macro capabilities good enough for creative object photography. A $15 clip-on macro lens can extend those capabilities even further.
What household objects work best for creative photos?
Reflective and translucent items work especially well, such as drinking glasses, spoons, keys, marbles, and ice cubes, because they interact with light in interesting ways. Simple, everyday objects like coffee mugs, books, or fruit also make strong subjects when photographed with intentional lighting and composition.
How do I get soft, professional-looking light without studio equipment?
Position your subject near a large window and diffuse the light using a sheer curtain or a piece of white parchment paper taped over the glass. A white foam board (around $4 at most craft stores) placed opposite the window will bounce light back and fill in shadows.
How can I make my everyday object photos look less amateur?
Simplify your background, control your light source carefully, and edit with intention rather than relying on heavy filters. Apps like Snapseed (free) let you adjust contrast, white balance, and sharpness to give simple shots a polished, professional finish.
How long should I practice with everyday objects before moving to bigger subjects?
There's no fixed timeline, but many photographers find that a 30-day daily practice challenge is enough to notice real improvement in composition and lighting instincts. Keep practicing with simple subjects even after you move on to bigger projects, since it remains one of the fastest ways to sharpen your eye.

Mark Finley is a professional photographer, educator, and the founder of FormLovers. With years of experience behind the lens, Mark has transitioned from a passionate hobbyist to an industry professional, capturing stunning visuals and mastering the business of photography.